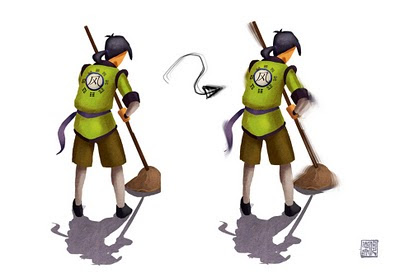
Here is something Ive just discovered accidentally during work. I was using the clone brush in Photoshop to expand an existing environment and I accidentally made some elements in the scene get this motion blur look. Then I thought to myself "I can use this to create motion blurs!" So here is a little demo how I did it. Its very easy, just use a clone brush and hold alt and click an area of your painting to select the origin from which you clone from. You can select it to clone from just your current layer or from the entire painting by clicking the box just under the top-bar. So now, alt click the edge you want to add motion to and move your cursor just slightly away from the edge and begin laying your mark down. (Bonus: you can clone with textured brush for effects, Ive been trying it with clouds to try get a fluffy look). The trick here is to keep changing the origin you clone from, otherwise it looks like the motion is really linear and mechanical because its going in one direction all the time. And control where the motion is, you will get less motion say in the shoulders than in the elbow as the shoulders is more like a pivot point, so erase the excess motions around there. Also I like to transform the motion blurs and rotate them so that they move in an arc.
Give it a try!

No comments:
Post a Comment