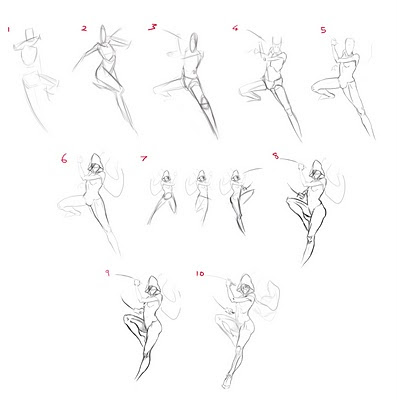
I wanted to show how I draw on Photoshop for a while and since the Shiek drawing got some good feedback I decided to use this one as an example. Here we goooo....
1,2,3) I often start out with some gestural thumbnails. Forget about anatomy for a slight moment and just concentrate on the pose, the energy and the action. This stage is all about getting an interesting feeling and direction to build on top of so it is quite an important stage as it dictates your whole drawing. It is the quickest phase but one of the most important in the planning. I opted for thumbnail #3 at the end. I think the raised arm across the body had a lot of authority to it especially with the head tilted down but with eyes looking up. The legs I wanted to be posed in a dynamic way as if the character is hanging in mid air which helps to show her attitude as an agile ninja. 4) As I said before, drawing alternates between gesture to structure to gesture to structure etc. With the foundation set I try to add some structure back into the gestural movement. In other words I start to build the anatomy into the gesture. 5) With the structure down I add the gesture back into it. It is easy to make something look stiff when you put anatomy into something so this part is about editing what part of the anatomy to show and what not to and also to add some movement into the forms (get some curves and striaghts in where the form turns etc). 6) Now I start the drawing that will appear on the surface. The construction is all but done. I start to think about the costume sitting on the character. 7) The legs was bugging me for a long time and I decided to explore alternatives to it so I turned to the quick way of solving a problem.... thumbnails! I felt the upper and lower body didnt look like the same pose as if they were both cropped together from two separate ones. 8) With the legs decided I draw back in the anatomy and the gesture. I also tilted her shoulders the other way to balance the pose. Generally the shoulders and pelvis tilt the opposite directions to counterbalance each other, however the character is hanging in the air so that law doesnt necessarily apply. 9) Some slight tinkering with the legs. It had too many straight edges and needed simplifying more. Also I toned down the exaggerated obliques that dangles off the illiac crest (pelvis) 10) Back to drawing the surface again. This isnt quite finished yet but the process from here on is a repeat of the ones I already listed so you should get an idea of how I draw now.
NOTE: Ah almost forgot to mention. Whilst I was drawing this I had an anatomy book by my side if I needed to check up on how muscles are bundled together in the legs and arms. I also had an anatomy manikin by my desk to reference so dont feel like you should do this without reference. It can be easily ignored but it is one of my secrets to improving. You constantly have to call upon what you know already (your visual library) but if you havent observed enough then your visual library will be thin and you will have little knowledge of shapes to call upon. Using reference helps me to observe and so I will always be discovering some new shapes rather than guessing.
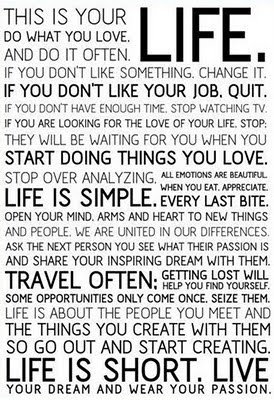
Oh and one final thing.... I found this on the internet and thought it was spot on and wanted to share it here. Another thing I wanted to post about is why I draw. I have a job already but I still draw in my own time. I want to try explain it one day... Have fun doing what you love, friends!


No comments:
Post a Comment