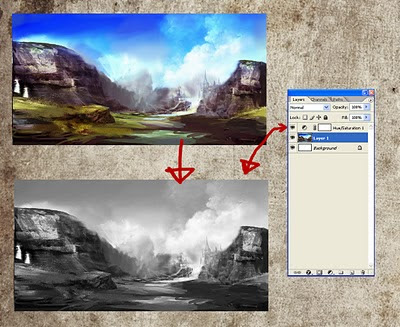
Another trick I want to quickly share. Ever since someone over on conceptart.org gave me this tip I have been using it for almost every painting Ive done. What this does is create a physical layer that desaturates everything underneath that layer so you can toggle it on/off to switch the painting from its current state to a grayscale one. The reason you want to use it is to keep a constant check on your values. The theory being that if it reads and works in simple black and white values then really any colour on top of that works. This is a layer I frequently turn on and off to make sure Im keeping things readable. So here is how you create it...
On the bar at the top of photoshop click Layer>New Adjustment Layer>Hue/Saturation. A new dialog box opens up asking you to name the new layer (just click OK) and then another box will open with all the goods inside. You have a few sliders and the middle one should control saturation, drag it all the way down (to the far left) and click OK. And voila! Your very own value checker :P

No comments:
Post a Comment